ARCHIVES: PRIOR SERVO NOTES, BRUSHED MOTOR UPGRADES & NIGHT LIGHTS
SERVO WARNINGS:
If you
received your Carbon Falcon with the black GWS servos note that these are no
longer being produced and our stock is now gone. As of 12/04 we are now
shipping with different brands of servos of greater torque rating. The
GWS HP Plus Naros have proven reliable and robust in operation but a few
precautions are in order:
Due to
these servo's high torque gear train, it is not advised to try to rotate the
servo horn by hand. We've noticed that it is possible to do so but not
always and there is a possibility of stripping the delicate gears if too much
pressure is exerted on the arm. If you do strip the gears, the standard
NARO replacement gear set can be used for repair.
IMPORTANT:
These servos are not rated for 6 volt use! If your ESC puts out more than
about 5 volts for whatever reason to the receiver, you will probably fry the
servo's driver boards sooner or later.
I
noticed from having a servo disassembled that the motor is held in place with
the case and circuit board soldered on to it. If the wires coming out of
the servo are pulled hard enough, besides popping the stress relief out of the
case, it will cause the board and motor to get shifted enough so the motor
pinion can get out of line with the gears causing slipping or no horn movement
whatsoever yet you'll hear the motor running. To prevent a possible
problem, just don't pull the wires tightly (like I did) so that in an impact,
they could get pulled. If this happens to you, it's an easy fix if you
don't mind disassembling the servo.
MOTOR UPGRADES:
Successful brushed motor upgrades include dual IPS-A drive (homebuilt and stock), M-100, EPS-100C, and the surplus Johnson motor with various drives, props and battery packs. Mounting generally is a simple matter of wire-tying the drives to the frame with or without the IPS mount stick in place. Just be sure to locate your thrust line just slightly above the center frame line if at all possible or you'll have up pitching tendencies with power to deal with if located below the frame. Too high isn't good either of course. If you must locate the motor below (to keep the heavier motor forward for CG balancing) try adding a little down thrust angle (back of motor at prop tilted slightly down relative to center frame). You'll know you have the correct angle when the plane doesn't want to go into a loop at full power anymore. :)
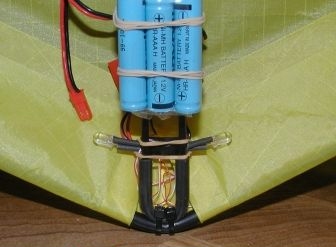
Be sure to add the speed stabilizer rod mod for any motor upgrade as it's well worth the little effort and expense required.
The GWS EPS 100C 1S drive is easily adapted and has proven to be a fair performer with a 7 cell AAA pack. It is heavy for its power output however and a dual IPS is lighter with more power.
Just shim the over-sized slot
with wood pieces for a snug fit on the stock mount.
Also the M-100 and LiPolys are being successfully adapted as well
as Johnson 250 motors to this drive.
(see discussion group links below
for more info)
The IPS-D "A" dual motor with a 10x8 prop is a good match with 7 cell NiMHs or LiPos.
The stock mount shown on the left offsets the prop
shaft which works but bugs me.
In flight however, the offset thrust line
compensates for torque nicely.
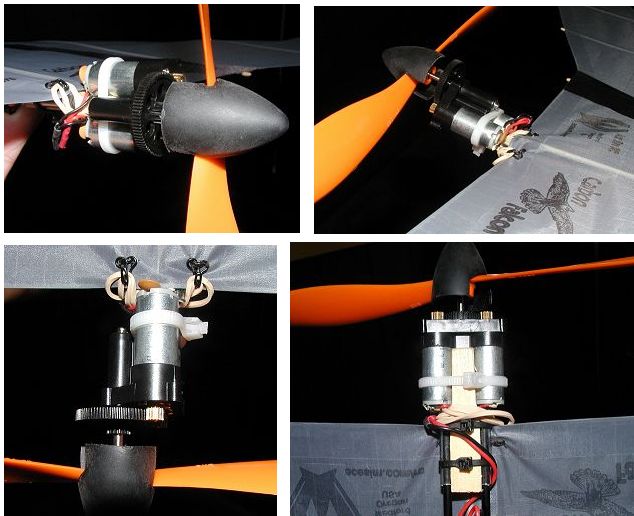
The arrangement on the right using a heavy wire
tie still allows the motor to be removed by sliding it off.
You will need to add some heat shrink or thin
tubing over the stick mount to snug it up however.
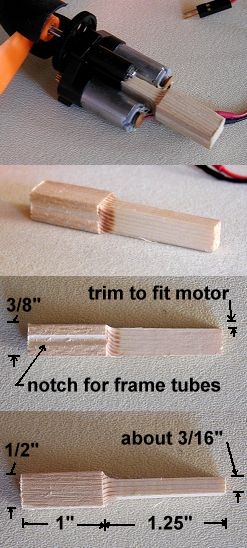
This mount can be easily made to fit the dual
motor correctly. Use a basswood or spruce stick that's 3/8" x
1/2".
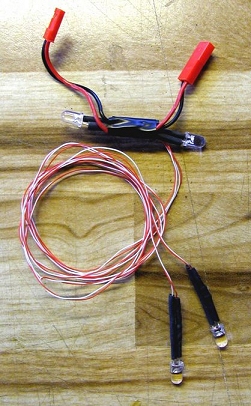
TURN ON THE LIGHTS
Note the easy to make removable light system.
Wires just run out the LE pockets to the tip LEDS.
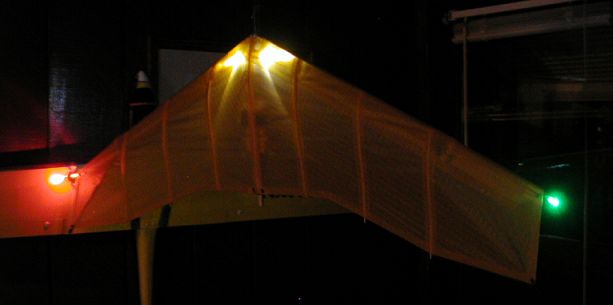
The tip LEDS just get secured in the wing tip
tension bands.
Be sure to use the proper resistors for each LED
to prevent burnout. (lots of info on rcgroups about LED setups)
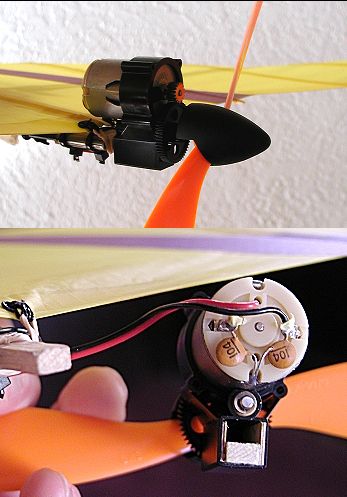
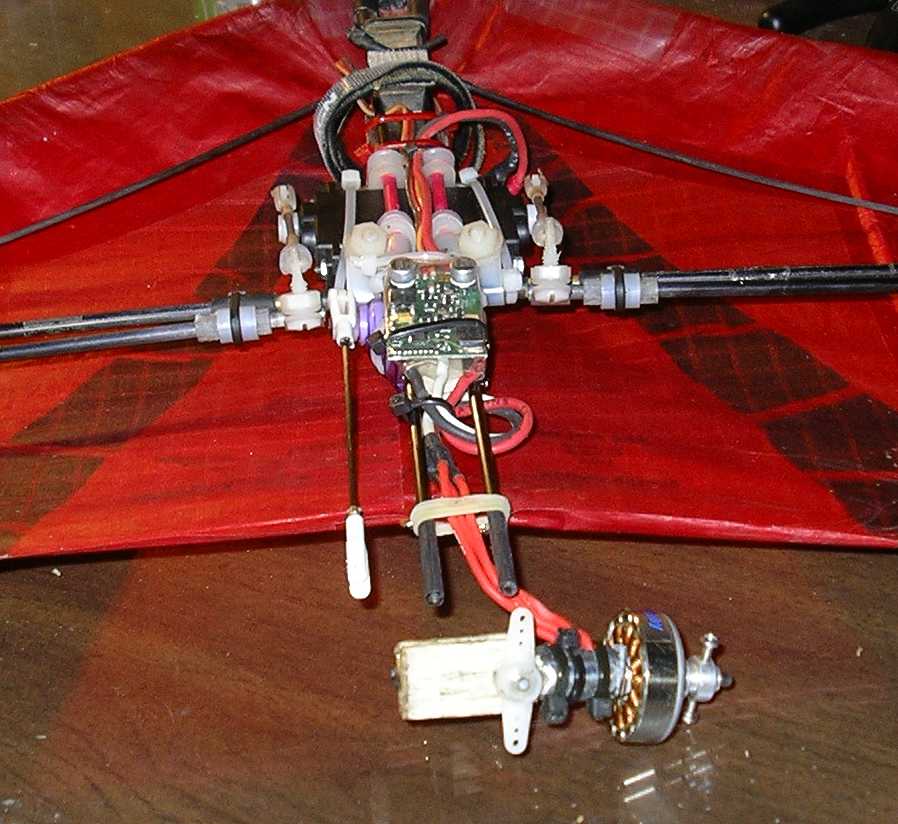
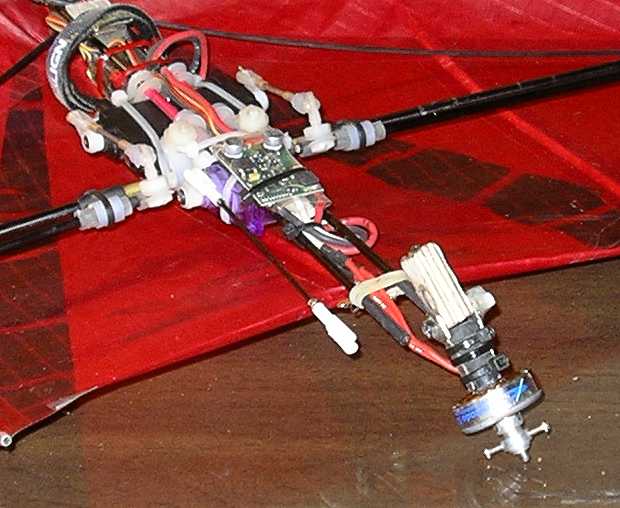
11/08: Bring new life to your CF! Here's a mod that gives
you 4 channel control using vectored thrust for yaw!
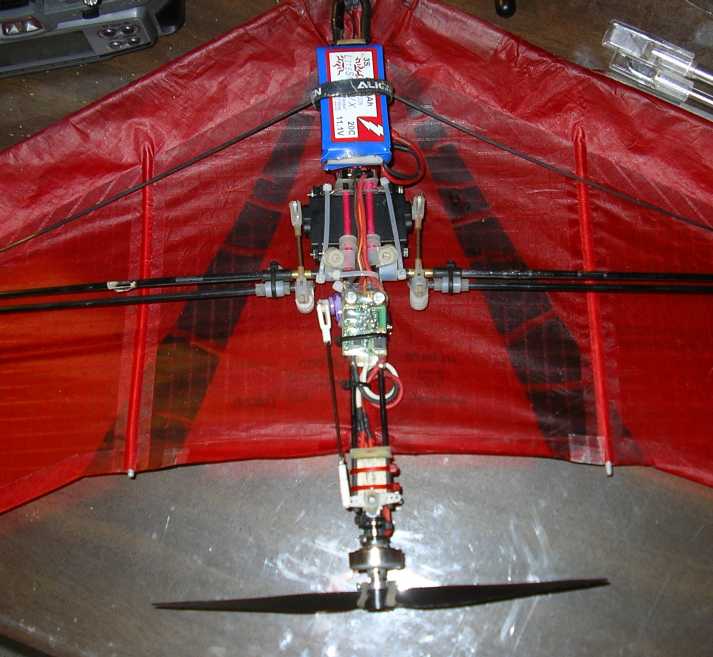


(click pics for larger view)
Here's the email I
received from the inventor:
"Hi Ken, I thought you might be interested in my latest upgrade to the
Carbon Falcon, namely a vectored thrust servo. It's a whole 'nother flying
machine! The CF can literally flat-spin with hard application of
"rudder" and a quick burst of throttle. Fantastic hammer-stall turns
and sideslip skids can be done; the tail just flicks around sweetly. Tight
axial rolls are now possible with judicious use of yaw. Great fun!! Definitely
worth trying...
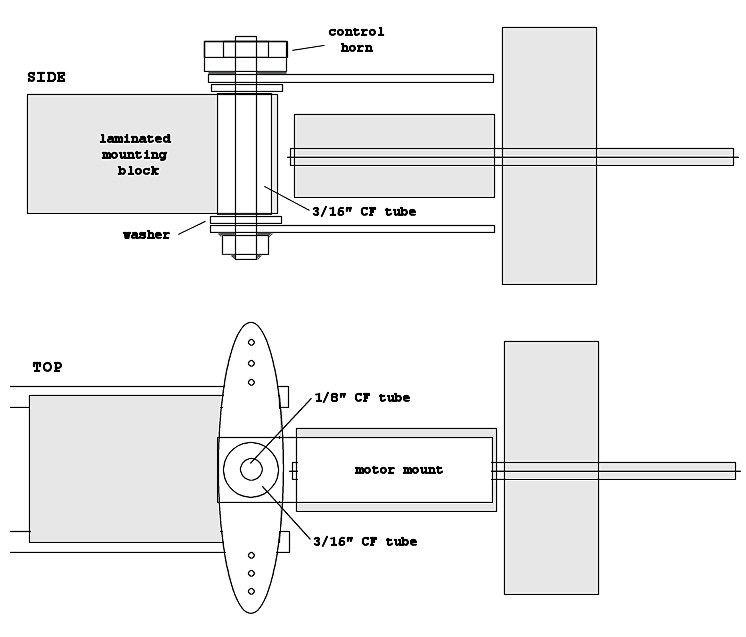
The mounting block is
laminated ply, grooved along the 2 sides to fit snugly between the fuselage
main spars, and drilled out to 3/16" at the rear end. The hinge comprises
a short length of 3/16" CF tube, glued into this hole in the mounting
block. A 1/8" CF hinge-pin then fits inside the 3/16 sleeve, with a couple
washers top and bottom, then the 2 metal motor support pieces, then the servo
control horn is glued into place on top. The bottom end of the hinge-pin is
capped by a control horn hub, epoxied onto the 1/8" tube. The motor is
wire-tied between the 2 support brackets, likewise the servo is wire-tied onto
the fuse spars behind the warperon servos. It's simple, light-weight and tough
(all the Essential Qualities)!
Flies like a bat outta hell. So much fun ought to be illegal...
Cheers, Richard"
Copyright © 2001 - 2017 Ace Sim RC - Springfield Oregon USA