Wally Wonder Wing V2 Construction
#8 MOTOR / RADIO / CONTROLS /TIPS
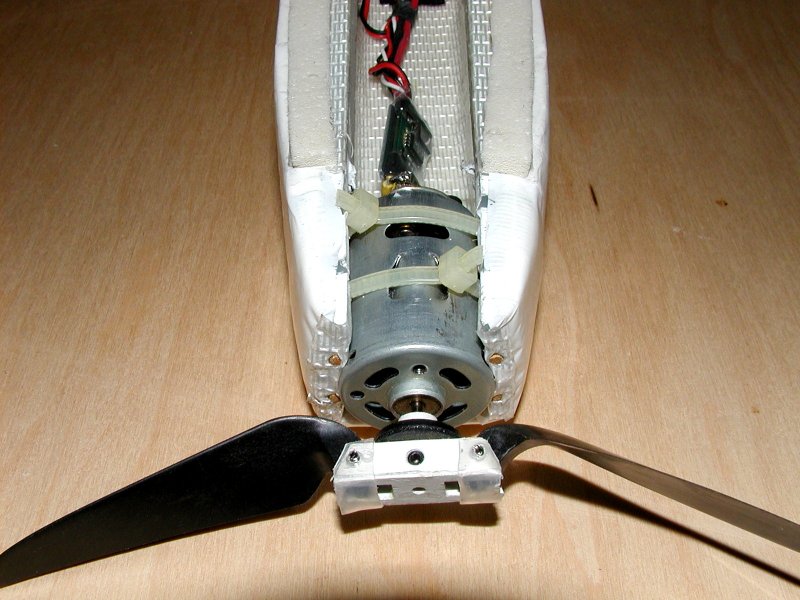
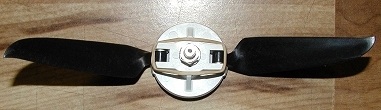
Here's the setup from V1
It's using a stock S400 with Graupner 6x3 folder adapted to a pusher.
Note forward and backward folding limiters.
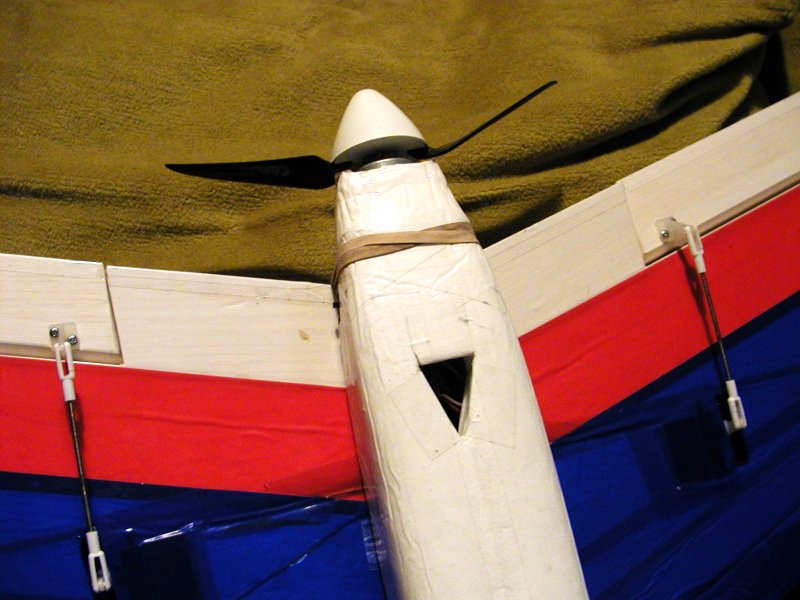
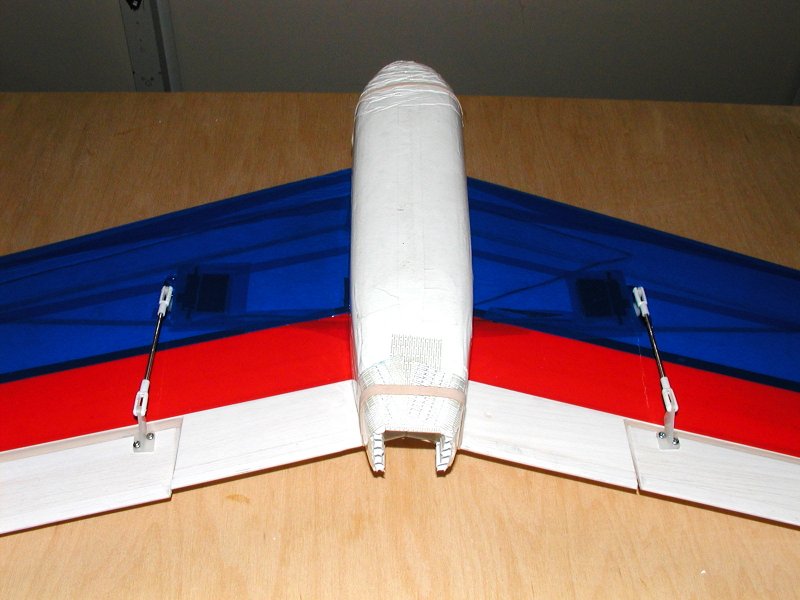
With this method of attachment, you can easily change the CG by shifting the
pod on the wing.
Add a strip of velcro to the battery pack and floor and always locate it
in the same place.
With an 8 pack of 1600's up against the nose, I've moved the CG via the pod
position back to where the motor is fully showing now.
Place a mark at the TE on the pod and you'll always have a quick reference
for your settings.
This is great with lighter packs that can't be moved forward any more.
Just move the whole pod forward!
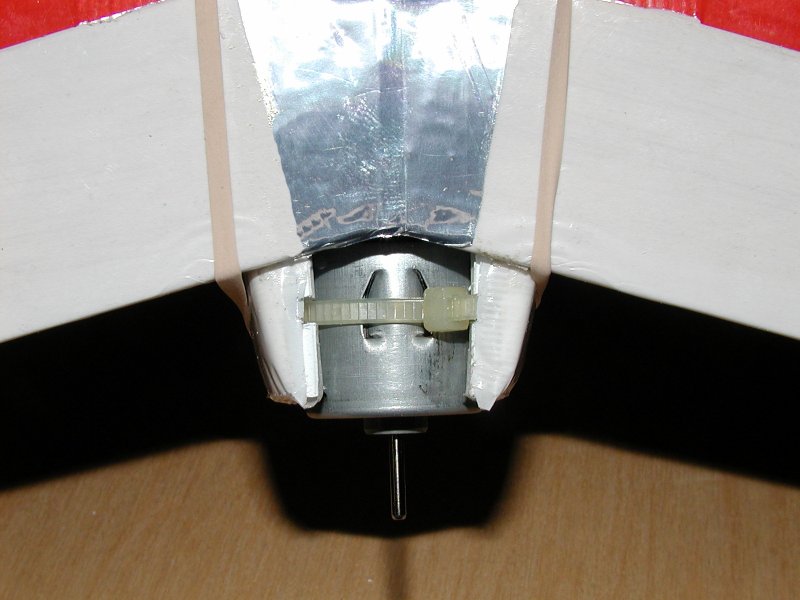
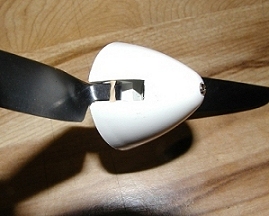
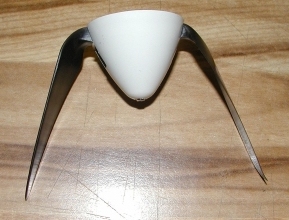
Newest prop version uses a Graupner 6.3 x 3 (larger hub, same blades) folder.
Only mod necessary is to add a small rubber band inside spinner to prevent
fold-over of tips when back.
Note also the airflow cutout added in the pod bottom for motor cooling.
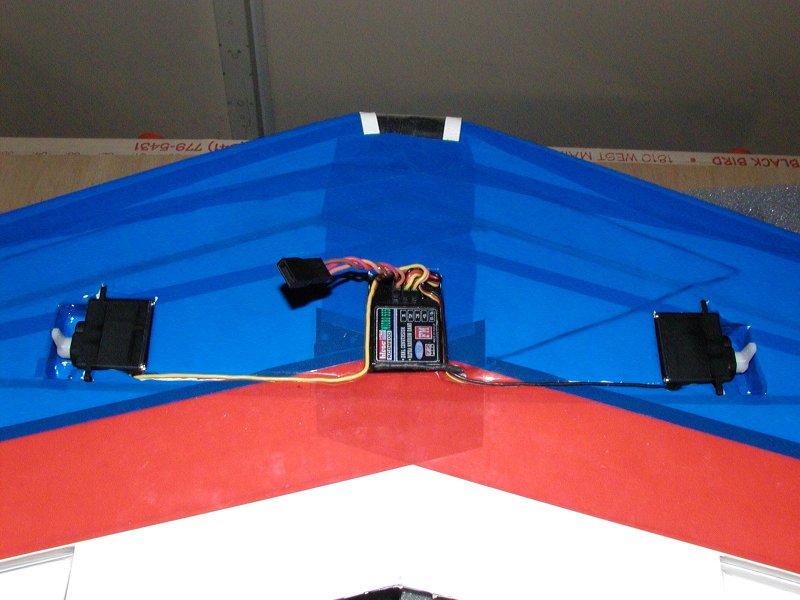
RADIO MOUNTING

Here's the layout showing receiver location and my detachable antenna (use a single servo connector) for swapping receivers.
I just insert it in a shallow cut in the foam and tape over it with the covering.
The connector stays exposed for easy receiver removal.
Servo locations are cut in for my HS-81s (MG recommended) and elevons are tape hinged on both sides off the top edge ready to go.
(Again, wing was sprayed with 3M super 77 before taping)
Undersize your servo and receiver cutouts so they will be snug fitted in the foam.
Note that the cutouts are as far outboard as the servo ears allow between the spars.
This wedges the servo tightly into place to prevent movement.
You can add the little rubber cushions to the ears also if you want.
Don't put double sided tape under the servos. (like I did on V1)
If you need to remove them later, you'll tear up the wing's foam trying to get them out.
Wing was taped right over cutouts, and then they were X sliced and the excess
tucked into the cutouts.
Add a piece of strapping tape over the servos and then add covering
tape over that for looks.
CONTROLS
4) 2-56 nylon snap clevises
2) DuBro 1/2A control horns
1) foot length (cut to required 2 pieces) of 2-56 threaded rod
V2 uses bottom mount control rods since they are so short, bending isn't an issue.
Neither is ground clearance since with the pod we have something to land on.
This also helps to maintain a clean top surface.
For the elevon hookup, keep the horn's holes over the hinge line of the control
surface.
Use long servo arms, and connect both in their outer holes.
Check control ops with a receiver battery installed.
Be sure that the right elevon (viewed from top rear) moves up with right
stick;
left elevon moves up with left stick;
and both elevons move up with back stick.
Check for any binding at full stick deflection in all four corners of stick
travel.
Note that the servo arms should be square to servo case with trims centered.
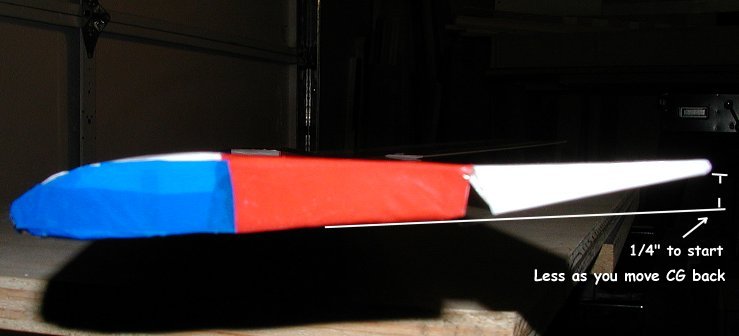
Elevons should be adjusted about 1/4" up at their TE from the wing bottom
at neutral stick with centered trims to start.
As you move the CG back, you'll trim them down, then readjust linkages once
dialed in.
TIPS
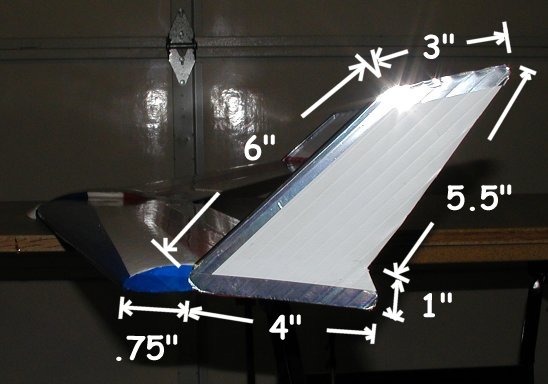
Cut out of coroplast with the web line along the tip LE.
Shape is mostly taste, but the area does have effect on handling.
I found that a thin plastic straw fits snug in the tip's LE web and when taped makes a nice streamlined edge.
At least tape over any edge that air can get into.
I'm still playing with tip design, and have tested Wally with no tips,
small tips, these tips, and larger inboard tips.
Also, I've played with where on the wing's tip the fin is attached.
Without a wind tunnel, it's hard to tell much, but I think the setup shown
works pretty good.
My thinking is that the vortex formed at the tip LE is allowed to wrap
over the top before the plate keeping flow over the top of the elevon longer.
The lower part acts as a drooped tip (as well as protecting the elevon from
ground contact) capturing the bottom spanwise flow and directing it back
under the elevon. Even at partial wing stall, if the airflow doesn't separate
from the elevons at the tips, we maintain control.
You do want them as far back as possible (thus the swept shape)
Too little area and she'll wallow on you.
Too much and you'll introduce spiral instability I've read.
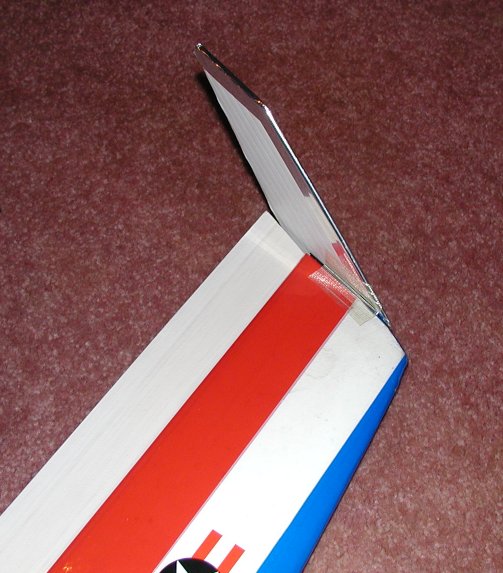
To attach, I just use double sided foam tape and add a piece of strapping
tape on the top and bottom.
BACK TO INDEX
NEXT PAGE